T-Shirt Guide
How to Hem a Shirt: A Step-by-Step Guide for Perfect Hems
Do you know how to hem a shirt? Hemming a shirt is necessary for everyone who wants a professional finish and flawless fit. Mastering the skill of hemming helps boost your sewing efforts, whether trimming an overly long shirt or modifying a garment to fit your style. This thorough guide will take you through the procedure, including precise instructions and helpful hints. By the end, you’ll have the expertise and confidence to hem shirts like a pro.
Preparing the Shirt

Before diving into the actual hemming process, properly preparing the shirt for alteration is crucial. This section will cover selecting the appropriate length, measuring and marking the desired hemline, and preparing the shirt for hemming.
Selecting the Appropriate Length
First, determine how much you want to shorten the shirt. Try it on and assess the ideal length based on your preferences and the style of the shirt. Remember that different styles may require varying amounts of fabric to be removed. For instance, a casual t-shirt might be shortened differently than a formal dress shirt.
Measuring and Marking the Desired Hemline
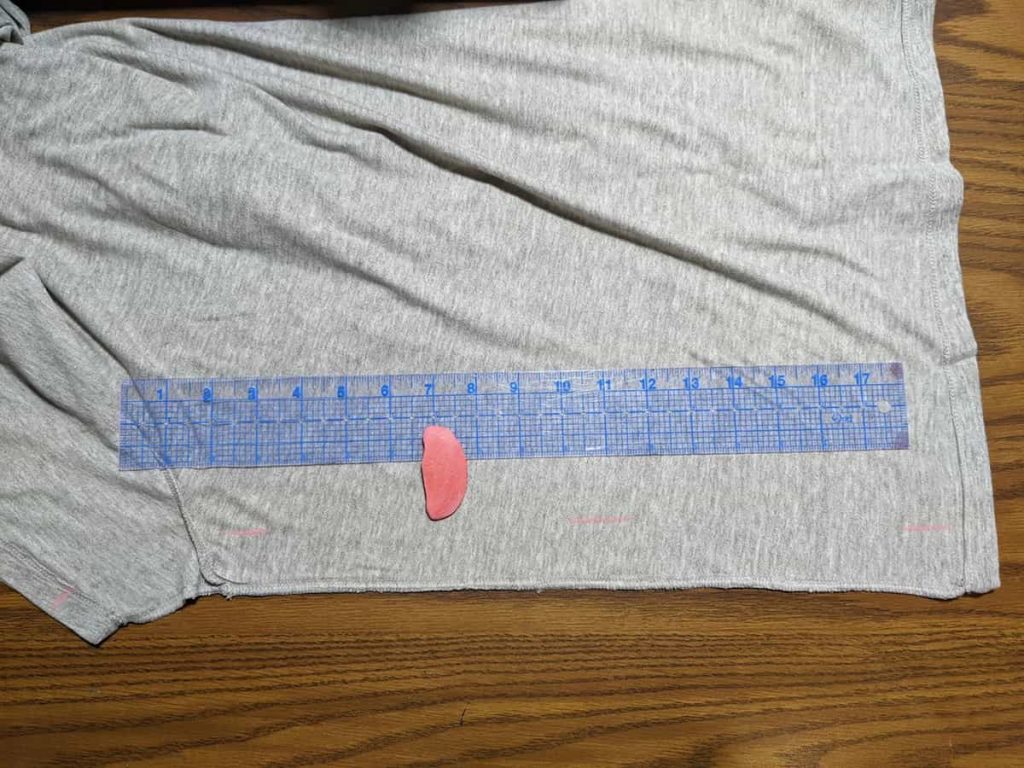
Using a measuring tape, carefully measure the distance from the bottom edge of the shirt to the desired new hemline. Mark this measurement with fabric chalk or pins on both sides of the shirt. Ensure the marks are even and straight for a professional result.
Preparing the Shirt for Hemming
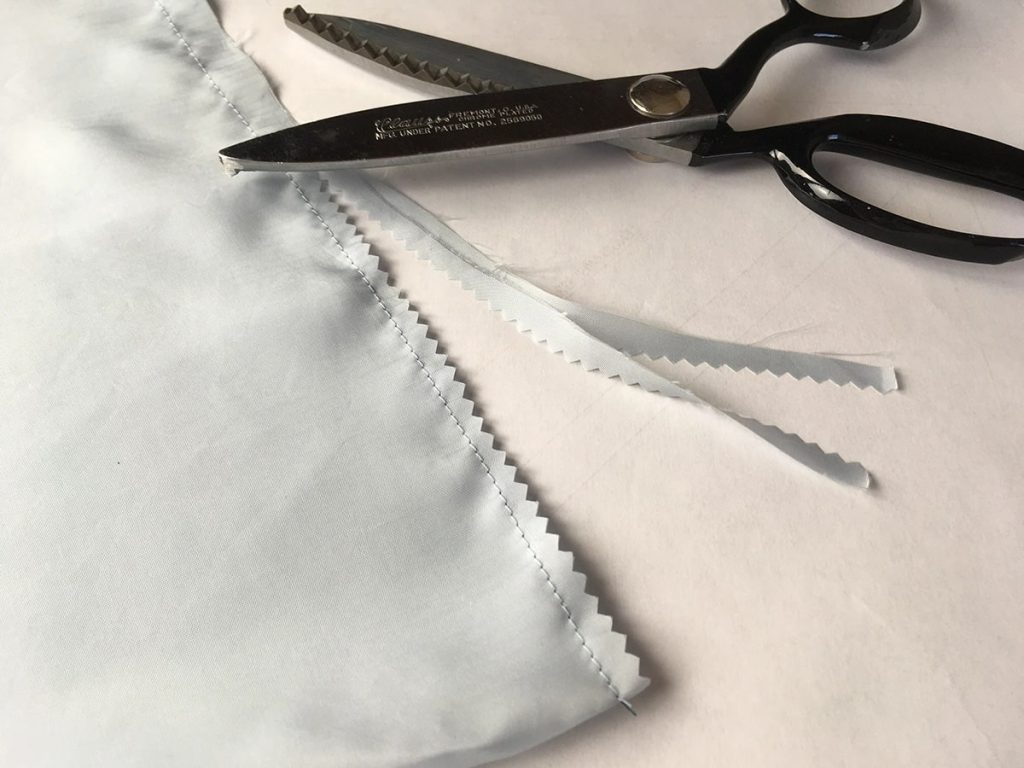
Now that the hemline is marked remove any buttons or embellishments from the area to be hemmed. This will make sewing easier and prevent damage to the shirt. If the fabric is prone to fraying, consider finishing the raw edges with a serger or a zigzag stitch.
Sewing Techniques for Hemming a Shirt

In this section, we’ll explore three popular sewing techniques for hemming shirts: the folded hem method, the blind hem method, and the rolled hem method. Each method offers a different finish and requires specific steps to achieve a polished result.
Folded Hem Method
The folded hem method is commonly used for casual shirts and involves folding the fabric twice to encase the raw edge. Follow these steps to create a folded hem:
- Folding and Pressing the Fabric: Fold the fabric up to the marked hemline, creating a small fold on the wrong side of the fabric. Press the fold with an iron to ensure it stays in place.
- Securing the Hem with Pins: Insert pins vertically along the folded edge, securing the hem in place. This will prevent the fabric from shifting while sewing.
- Sewing the Folded Hem: Using a straight stitch, sew close to the folded edge of the hem. Remove the pins as you go, ensuring a smooth and even stitch line. Backstitch at the beginning and end to secure the thread.
Blind Hem Method
The blind hem method uses small, hidden stitches to create an almost invisible hem. This technique is often used for dress shirts or garments where a visible hemline would be undesirable. Follow these steps to achieve a flawless blind hem:
- Marking the Blind Hem Fold Line: Measure and mark a specific distance from the bottom edge of the shirt. This measurement will determine how much fabric is folded to create the blind hem.
- Folding and Pressing the Fabric: Fold the fabric along the marked line, tucking the raw edge inside. Press the fold with an iron to create a crisp crease.
- Sewing the Blind Hem Stitch: Using a blind hem foot on your sewing machine, select the appropriate stitch setting. This special foot helps guide the fabric and create nearly invisible stitches. Sew along the fold, catching only a few threads from the folded side and occasionally anchoring it with a small stitch from the main fabric.
Rolled Hem Method
The rolled hem method is ideal for lightweight fabrics and provides a delicate, narrow finish. Follow these steps to achieve a beautifully rolled hem:
- Folding and Pressing the Fabric: Fold the raw edge of the fabric approximately ¼ inch (0.6 cm) to the wrong side, pressing it with an iron. Then, fold the fabric again, encasing the raw edge within the hem. Press this second fold as well.
- Securing the Hem with Pins: Insert pins vertically into the hemmed edge, holding the roll in place. This will prevent the fabric from slipping during sewing.
- Sewing the Rolled Hem: Using a straight stitch or a narrow rolled hem stitch on your sewing machine, sew close to the inner folded edge of the hem. Remove the pins as you go and backstitch at the beginning and end to secure the thread.
Finishing Touches of Hemming a Shirt Process
After completing the desired hemming technique, a few finishing touches will enhance your hem’s overall look and durability. This section will cover trimming excess fabric, pressing the finished hem, and inspecting and adjusting the hem if necessary.
Trimming Excess Fabric

Once you’ve sewn the hem, carefully trim any excess fabric close to the stitch line. Leave a small allowance to prevent fraying or unraveling over time. Take care not to cut into the main body of the shirt.
Pressing the Finished Hem
To give your hem a professional finish, use an iron to press it. Set the iron to the appropriate heat setting for the fabric type. Press the hem, following the folded edge, to create a crisp and smooth appearance. Pressing will also help the stitches settle and improve the overall durability of the hem.
Inspecting and Adjusting the Hem, if Necessary
After pressing, closely inspect the hem for any unevenness or lose stitches. If you notice any imperfections, take the time to fix them by re-stitching or adjusting the hem as needed. Ensuring the hem is even and secure before moving on to the final steps is crucial.
Additional Tips for Hemming a Shirt
Hemming a shirt can be straightforward, but additional tips and considerations can improve your results. This section will guide choosing the right thread color, using appropriate sewing machine settings, and working with different fabrics.
Choosing the Right Thread Color

The appropriate thread color is essential for achieving a seamless and professional finish. Choose a thread color that matches the fabric or blends in harmoniously. If an exact match isn’t available, opt for a slightly darker shade rather than lighter, as it will be less noticeable.
Using Appropriate Sewing Machine Settings
When hemming a shirt, adjust your sewing machine settings according to the fabric you work with. Use a smaller needle size for lightweight and delicate fabrics and decrease the tension to prevent puckering or pulling. Heavier fabrics may require a larger needle and slightly increased tension. Always test on a scrap piece of fabric before hemming the actual shirt.
Working with Different Fabrics
Different fabrics require specific handling to achieve a professional hem. Lightweight fabrics like silk or chiffon may benefit from a rolled hem technique to prevent bulkiness. For stretchy fabrics, consider using a narrow zigzag stitch or a twin needle for flexibility. Experiment and adjust your techniques to suit the fabric’s characteristics and desired outcome.
How to Hem a Shirt – FAQs
Can I hand sew a hem instead of using a sewing machine?
Yes, you can hand sew a hem using a needle and thread. Follow the same folding and pinning steps outlined in the respective methods, and use small, even stitches to secure the hem in place.
What if my shirt has a curved hemline?
Curved hemlines can be a bit trickier to hem, but the same techniques can still be applied. Use more pins to hold the fabric in place, and ease the fabric as you sew to accommodate the curve smoothly.
How do I remove an existing hem before hemming the shirt?
You can use a seam ripper or small scissors to remove the stitches from the existing hem carefully. Take your time to avoid damaging the fabric, and press out any creases or marks left behind.
Wrapping Up
Knowing how to hem a shirt is a valuable skill allowing you to customize your clothing perfectly. Following this step-by-step guide, you’ve learned various hemming techniques such as the folded hem, blind hem, and rolled hem. Remember to prepare the shirt properly, sew precisely, and give attention to the finishing touches for a polished result. You’ll become more confident in your hemming skills and easily tackle any shirt alteration project with practice. Don’t hesitate to embrace the joy of DIY and create perfectly hemmed shirts tailored to your style and fit.

I am Estelle Krattinger, a multi-talented creative artist from Paris, France. Known for my captivating photography and enchanting storytelling, I have garnered a dedicated following on Instagram, where I share glimpses of my artistic journey and creative pursuits. With an impeccable eye for detail and a passion for exploring the beauty in the mundane, my work showcases my unique perspective and artistic vision.

